Jeep Battery Holddown Fabrication
During this pandemic, I have been driving my 2004 Jeep TJ much less than before. It’s normally my daily driver, but with my being unemployed, and everything else, I’m not driving it nearly as much as I used to. Maybe once or twice a week I’ll drive it, usually to go hiking or grocery shopping.
A few weeks ago, I found my battery dead, and the holddown strap was broken. I put in a new battery (my Jeep uses what is known as a “Group 34” size battery), but I needed a better holddown strap. The broken one was just a cheap rubber thing I had picked up at Auto Zone, but the j-bolts could be reused. I honestly don’t know how or when it broke, but it needed to be replaced, and since I had some time on my hands…
Making Plans
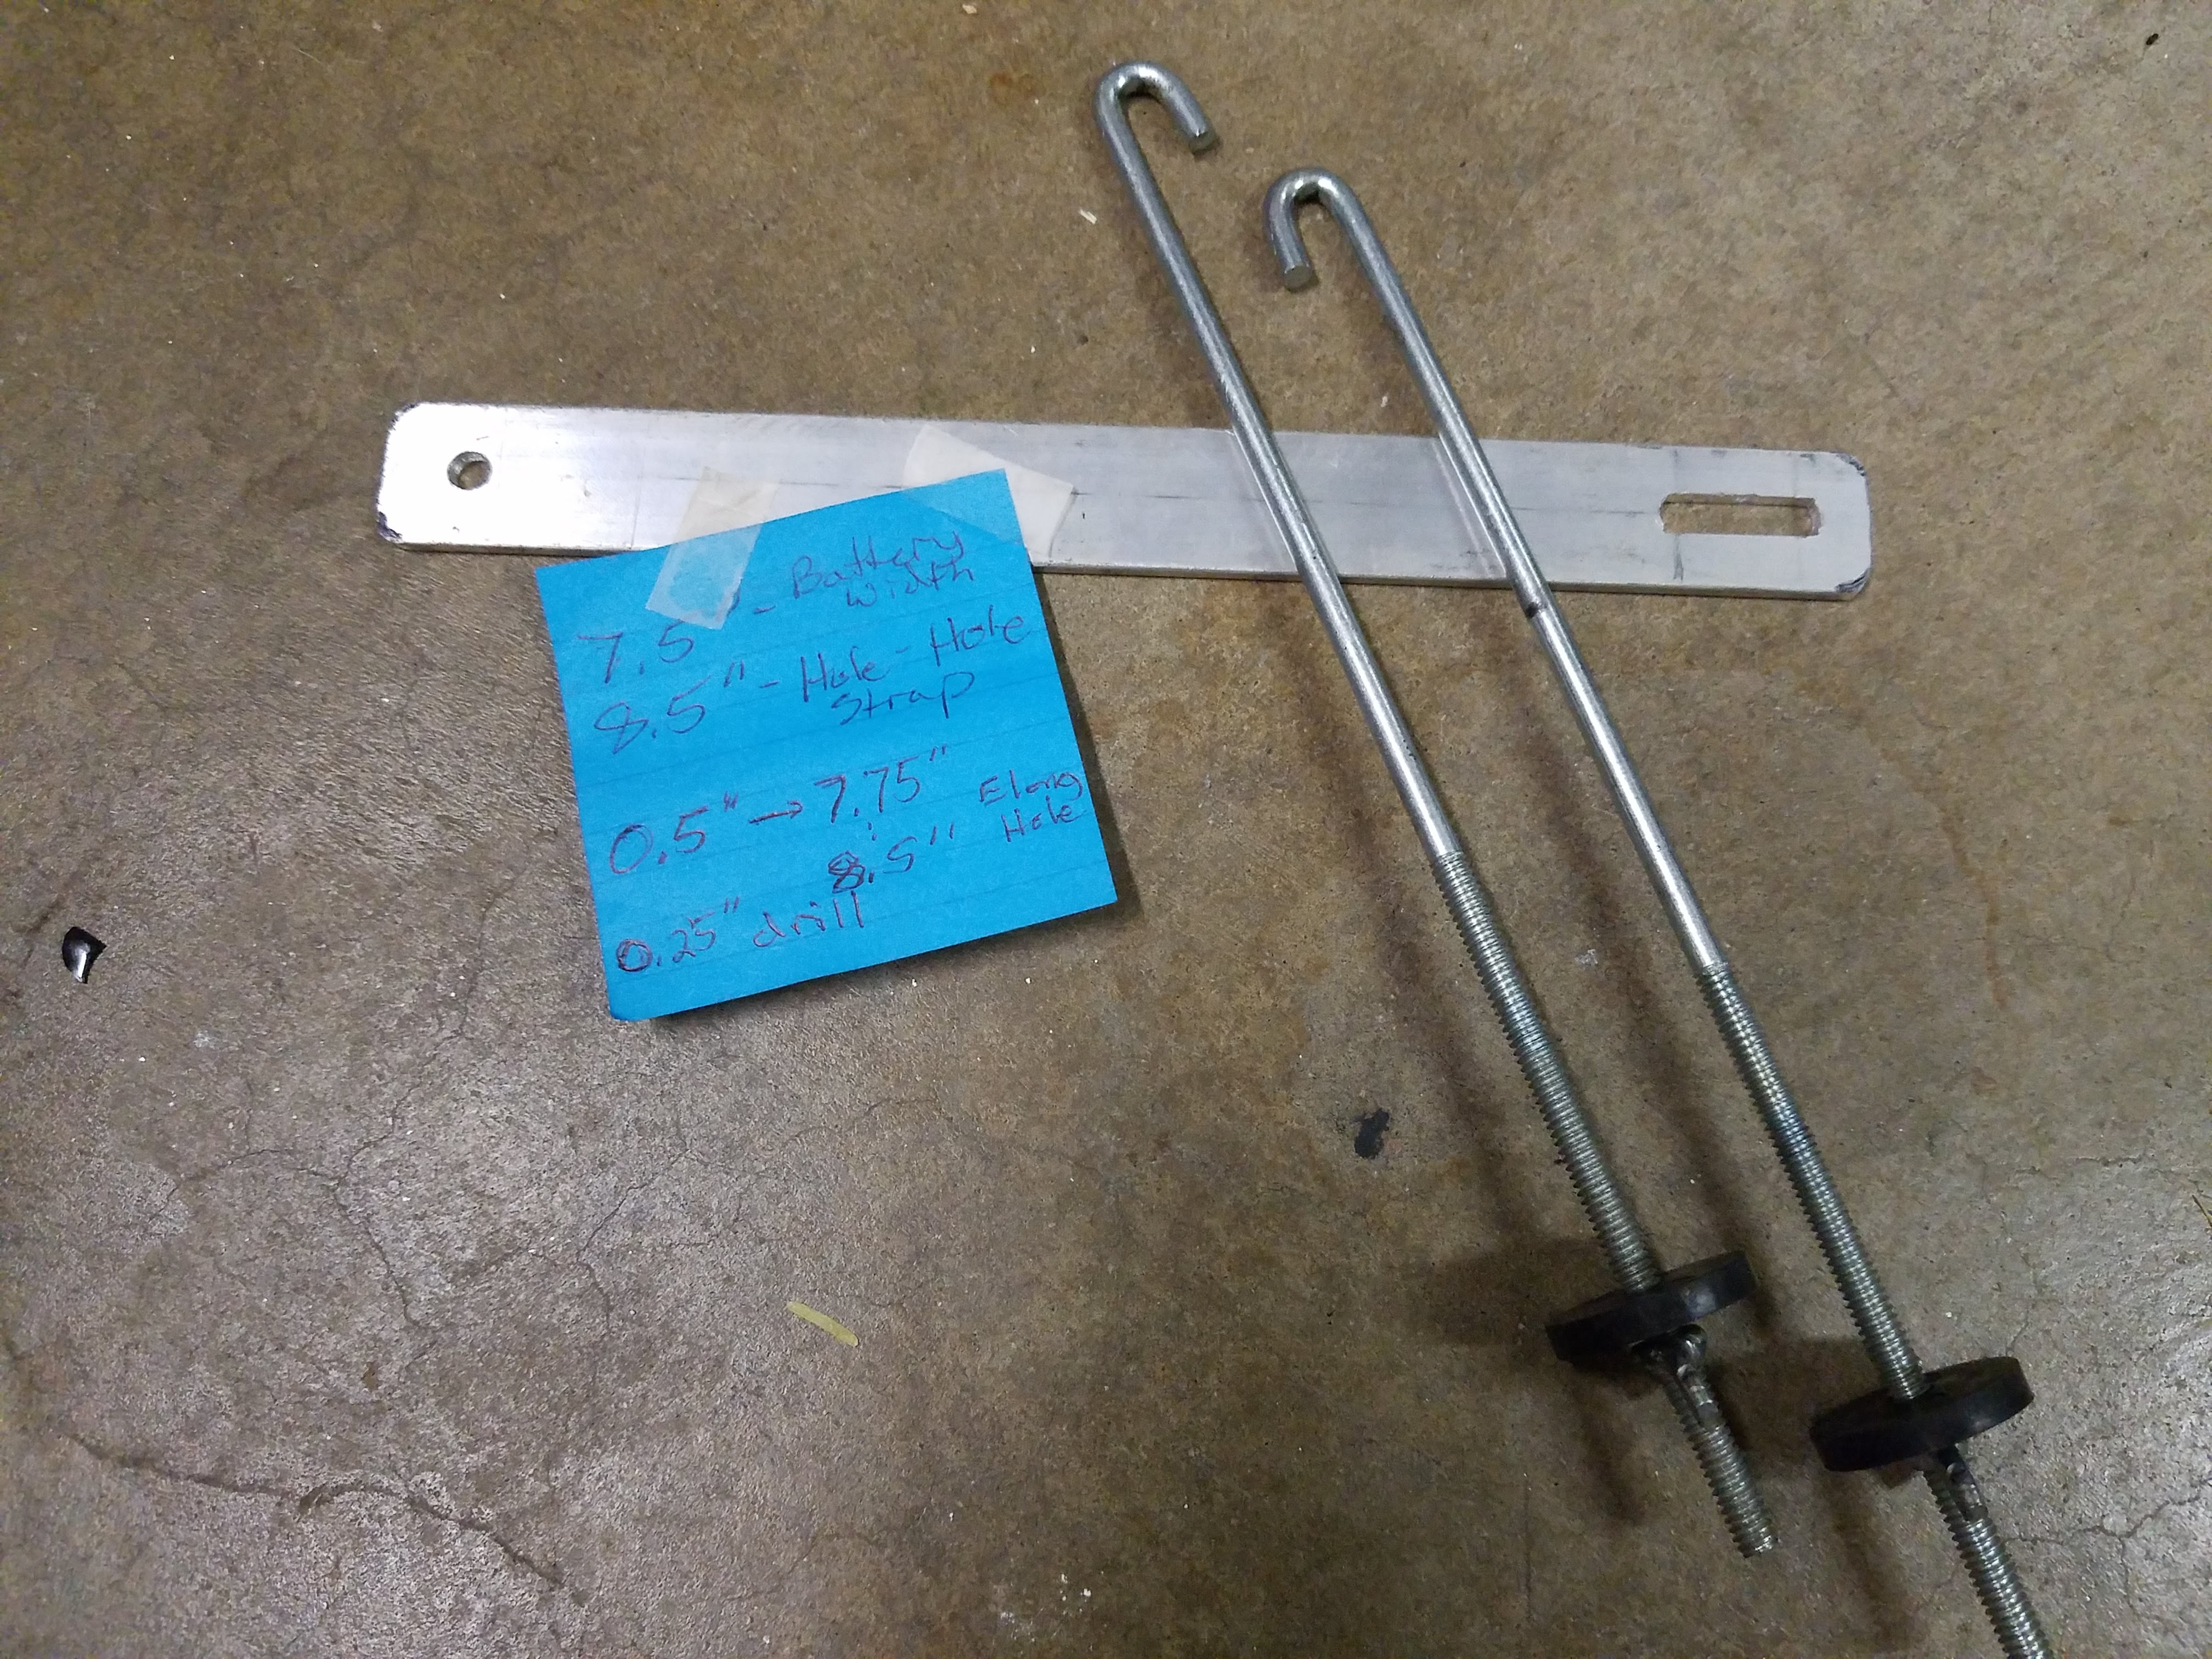
About a week ago, thanks to my friend Lance and his generosity, I was gifted a piece of aluminium strip (also called bar stock) to allow me to craft a new strap. I took some quick measurements of the width of my battery, and drew up some plans:
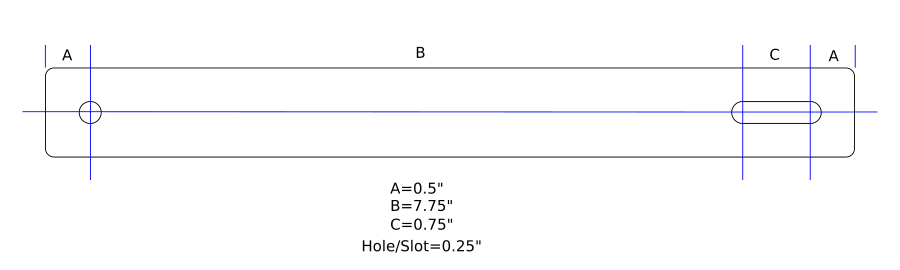
If you want to build one yourself, you’ll need a piece of 1" by 1/8" thick piece of aluminum strip, or some other kind of material. The thickness mentioned is fine if you’re making it out of metal, but if you want to make it out of some form of plastic (like HDPE, ABS, PVC, or nylon), you’ll probably want to use a thicker material. The length of the aluminum I had was longer than I needed, about 36“; you can use a shorter piece (the total length of the holddown is 9 1/2”).
A quick note: This holddown strap was designed to fit my Jeep TJ, which uses a single Group 34 size battery, and has the standard battery tray. I can’t say whether it will fit any other Jeep or not. It likely won’t fit anything newer than the TJ. If you have a dual-battery setup, or something like that, then it’s likely you don’t need this strap at all. Maybe one day I’ll join you in such madness, probably right after I get a winch installed…
Once you have your material selected, scribe or otherwise mark a centerline down the length (I used a pencil), then centerpunch a mark on the line 1/2" from the end. Punch another mark 7 3/4" away from the first mark, then punch an additional third mark 3/4" from that one. Mark a cut line a further 1/2" from the last center mark. The cut line should be 9 1/2" from the other end of the stock.
When drilling the holes, it is recommended that you clamp the work securely to prevent injury should the drill bit “grab” the piece. Use cutting fluid if needed (recommended for steel). I ended up using a smaller drill bit to drill out the holes, before switching to a 1/4" bit to finish them (the j-bolts I had were 1/4" in diameter, yours may be differently sized). This keeps the larger bit from wandering from the marks, and also helps prevent the bit from “grabbing” the edges of the hole, which can damage the drill bit, the drill motor, or cause the work piece to spin; cutting fluid can also help prevent this.
With the holes completed, crafting of the slot can begin. You can do this with a Dremel, or use a jigsaw with a fine blade. If the latter, the blade will need to be narrow enough to fit through a 1/4" hole. Alternatively, multiple holes can be drilled, then use a cold chisel to remove the excess from between the holes. Use your imagination here to figure out how to make the slot!
Once you have the slot roughed out, cut the strip on the cut line with your Dremel or jigsaw, then clean up all the edges, holes, etc with a file. Optionally, but recommended, round the corners of the strap with the file, too. This gives it a more finished look, while also making it less likely to injure hands when installing or working around it later.
The Results and Installation
My fabrication isn’t the best looking out there, but it got the job done. Here is the new finished strap with the j-bolts from the old holddown strap:
…and here it is installed on my battery:
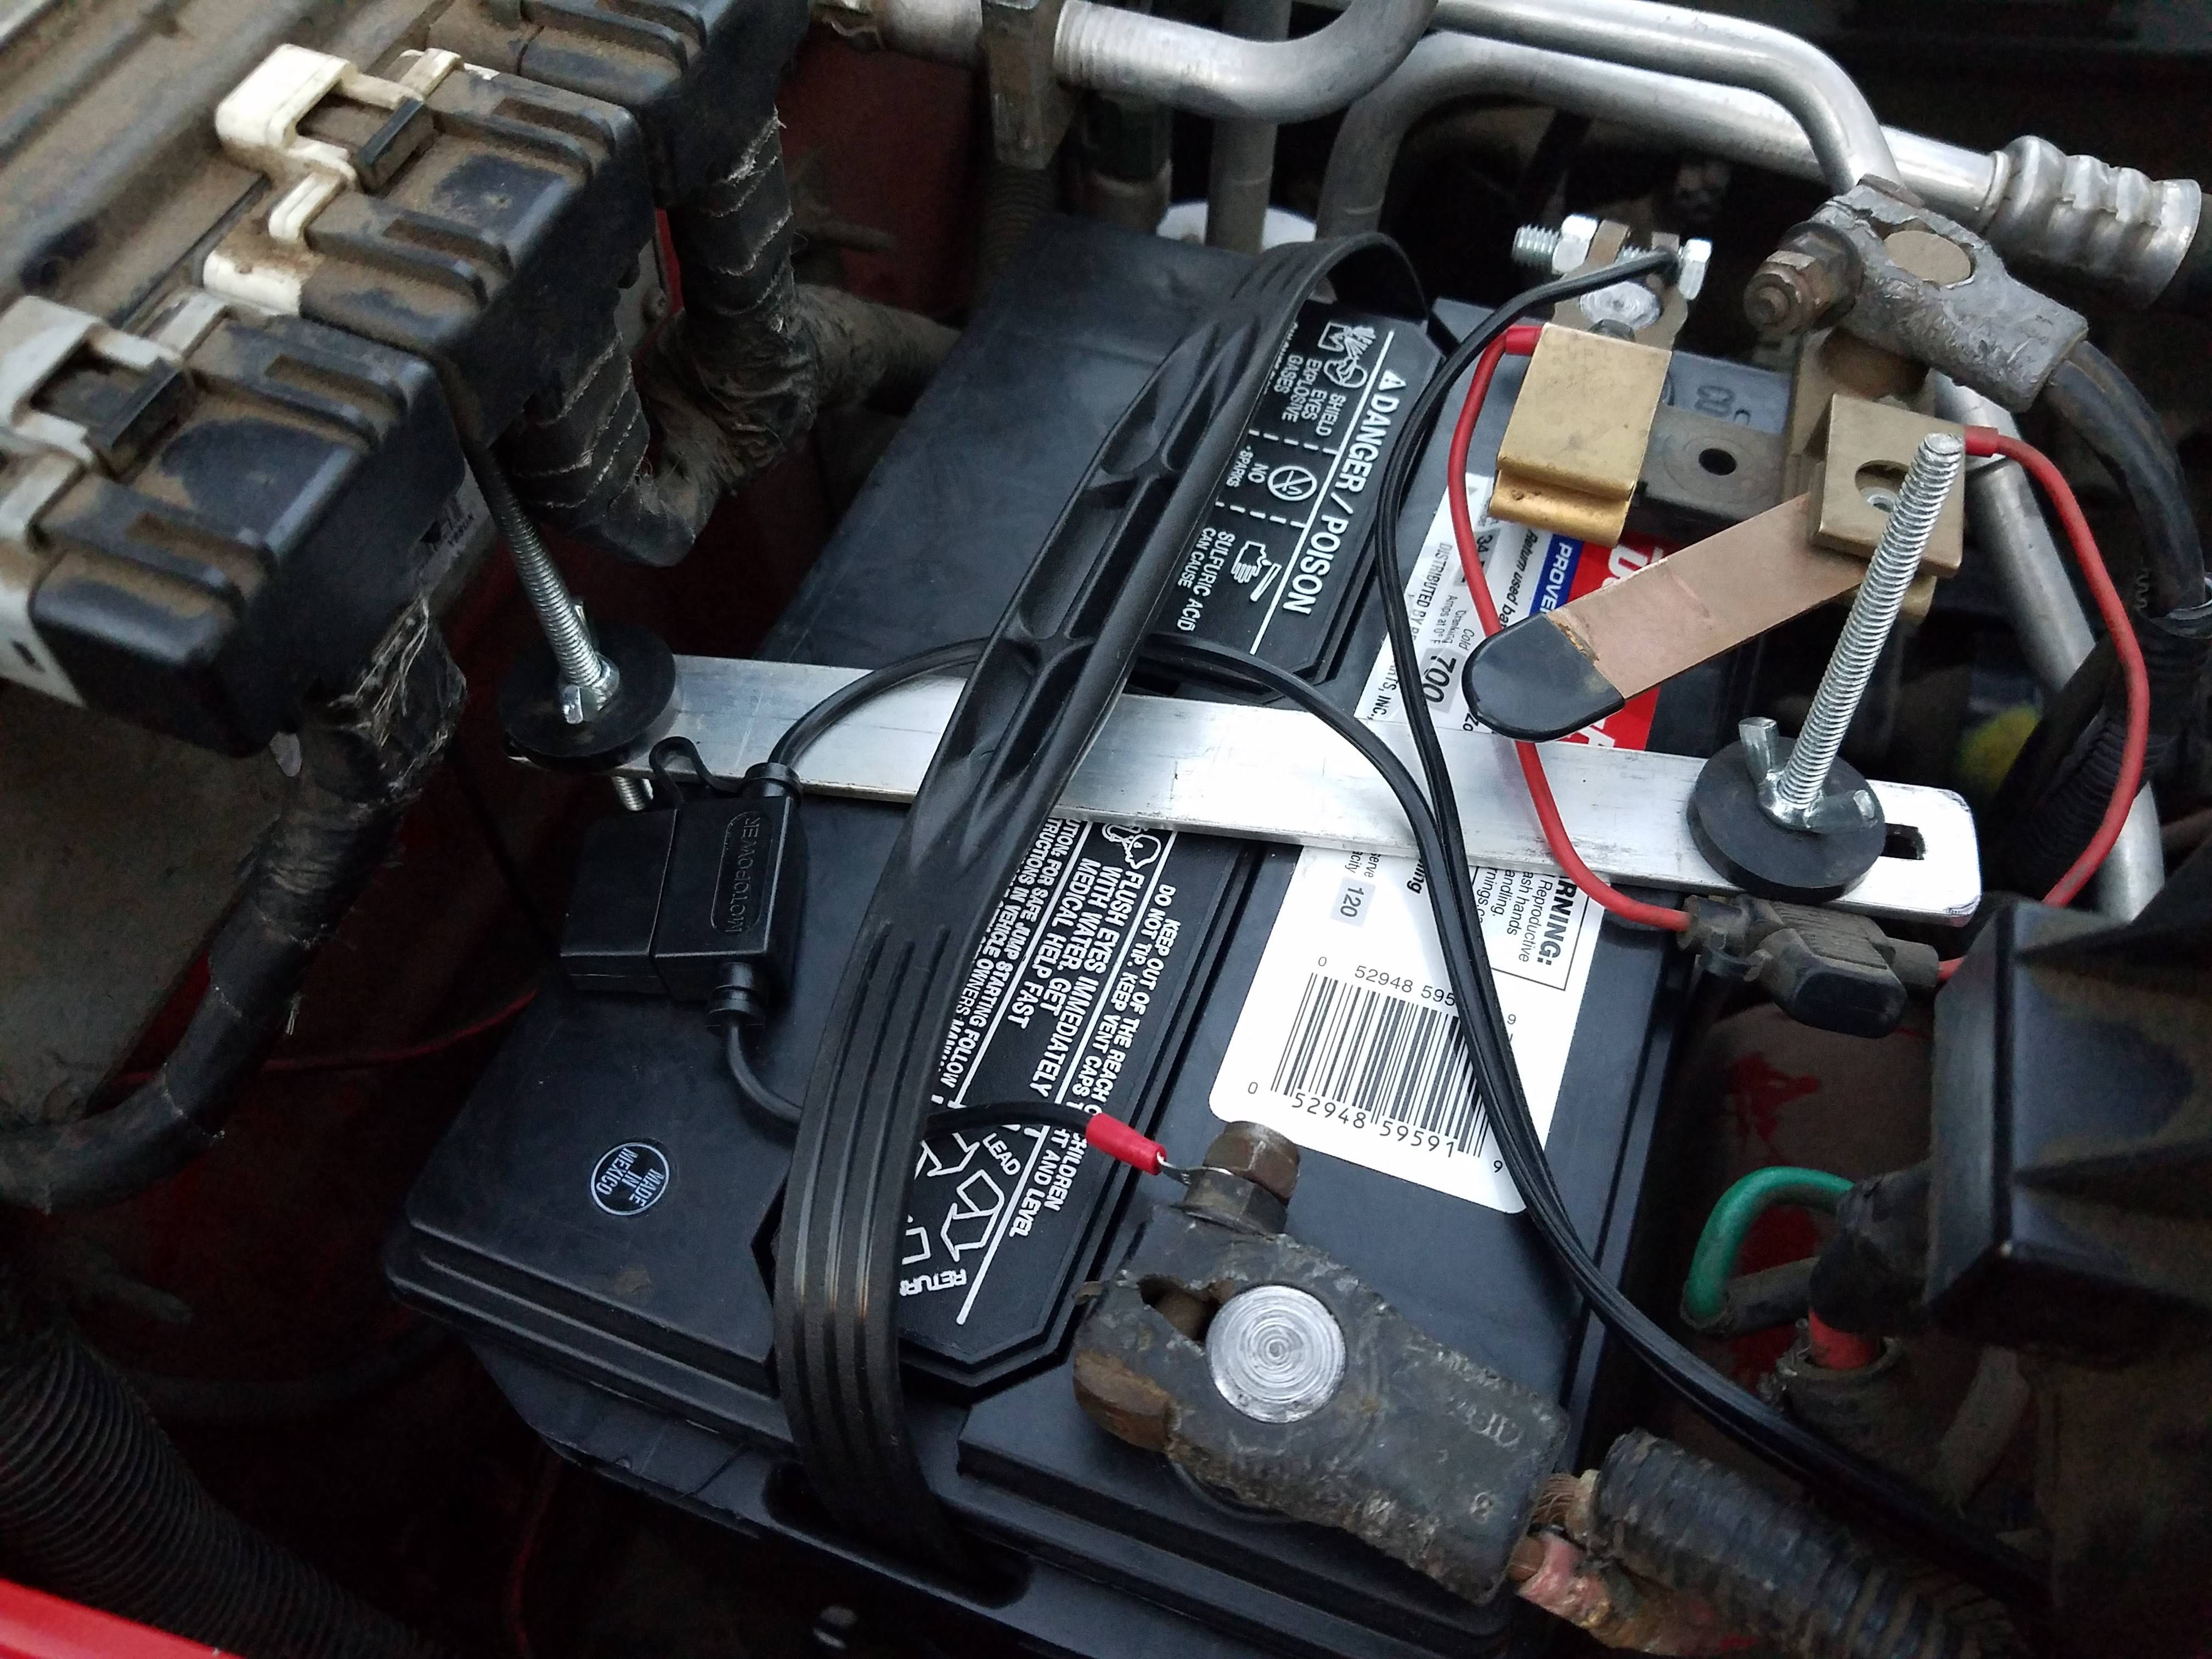
In case you’re wondering, I do need to shorten those j-bolts up a bit. The one toward the firewall is a wee-bit long, and comes close to the ECU connector, though both could use a trim. Also, don’t worry about the battery cutout switch, it’s installed on the negative terminal of the battery, so if it touches the holddown strap bolt, no issues…in theory.